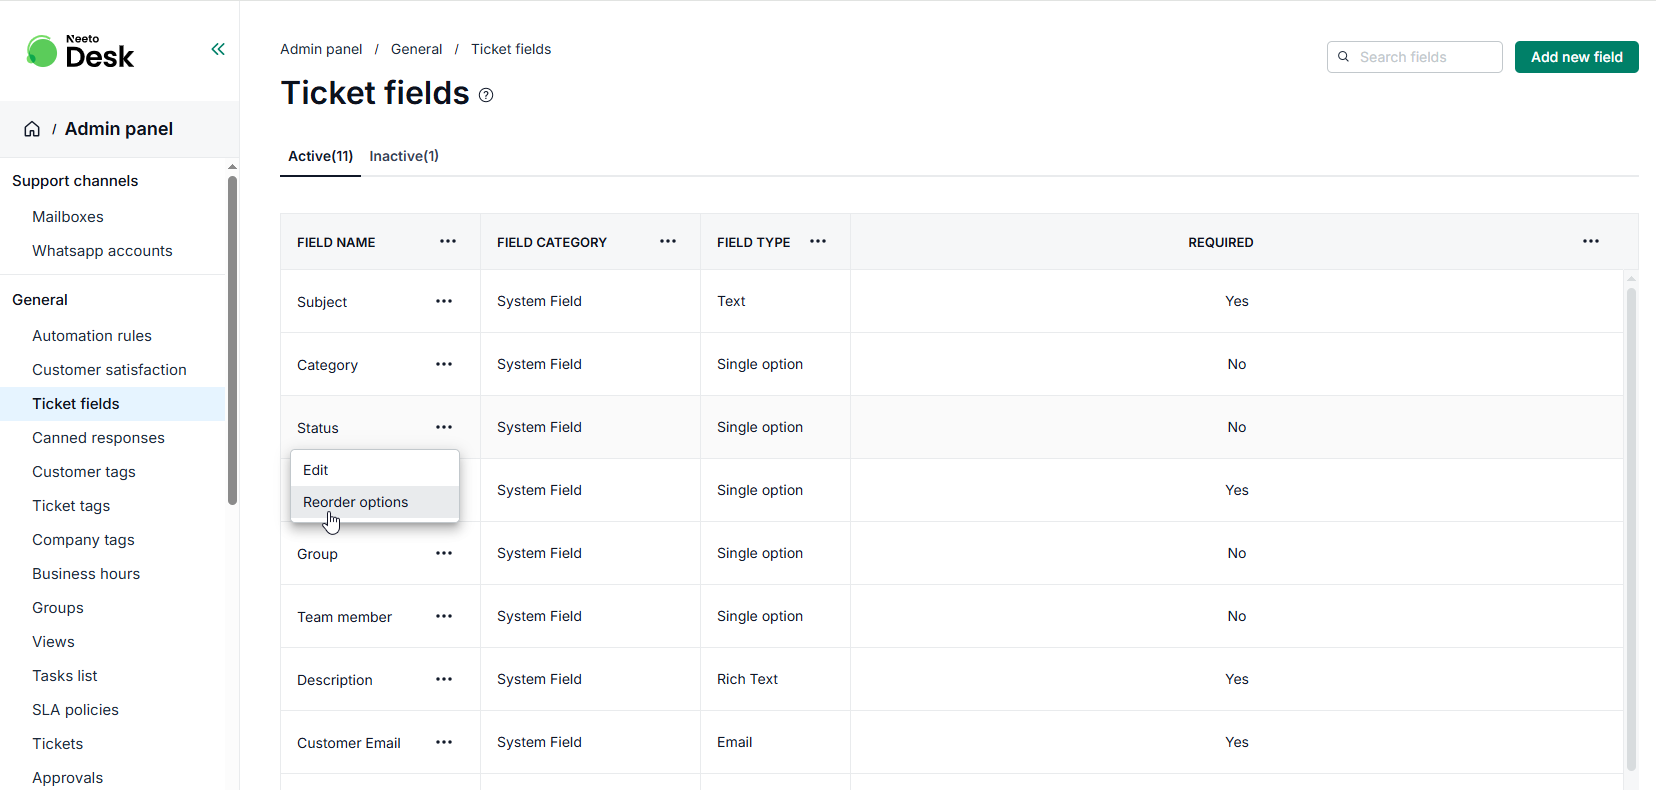

You can customize your workflow by adding or editing categories, statuses, and priorities to better fit your team's needs. For example, you might want to include a status like "Under Development" or create a category that isn’t provided by default.
To customize these option
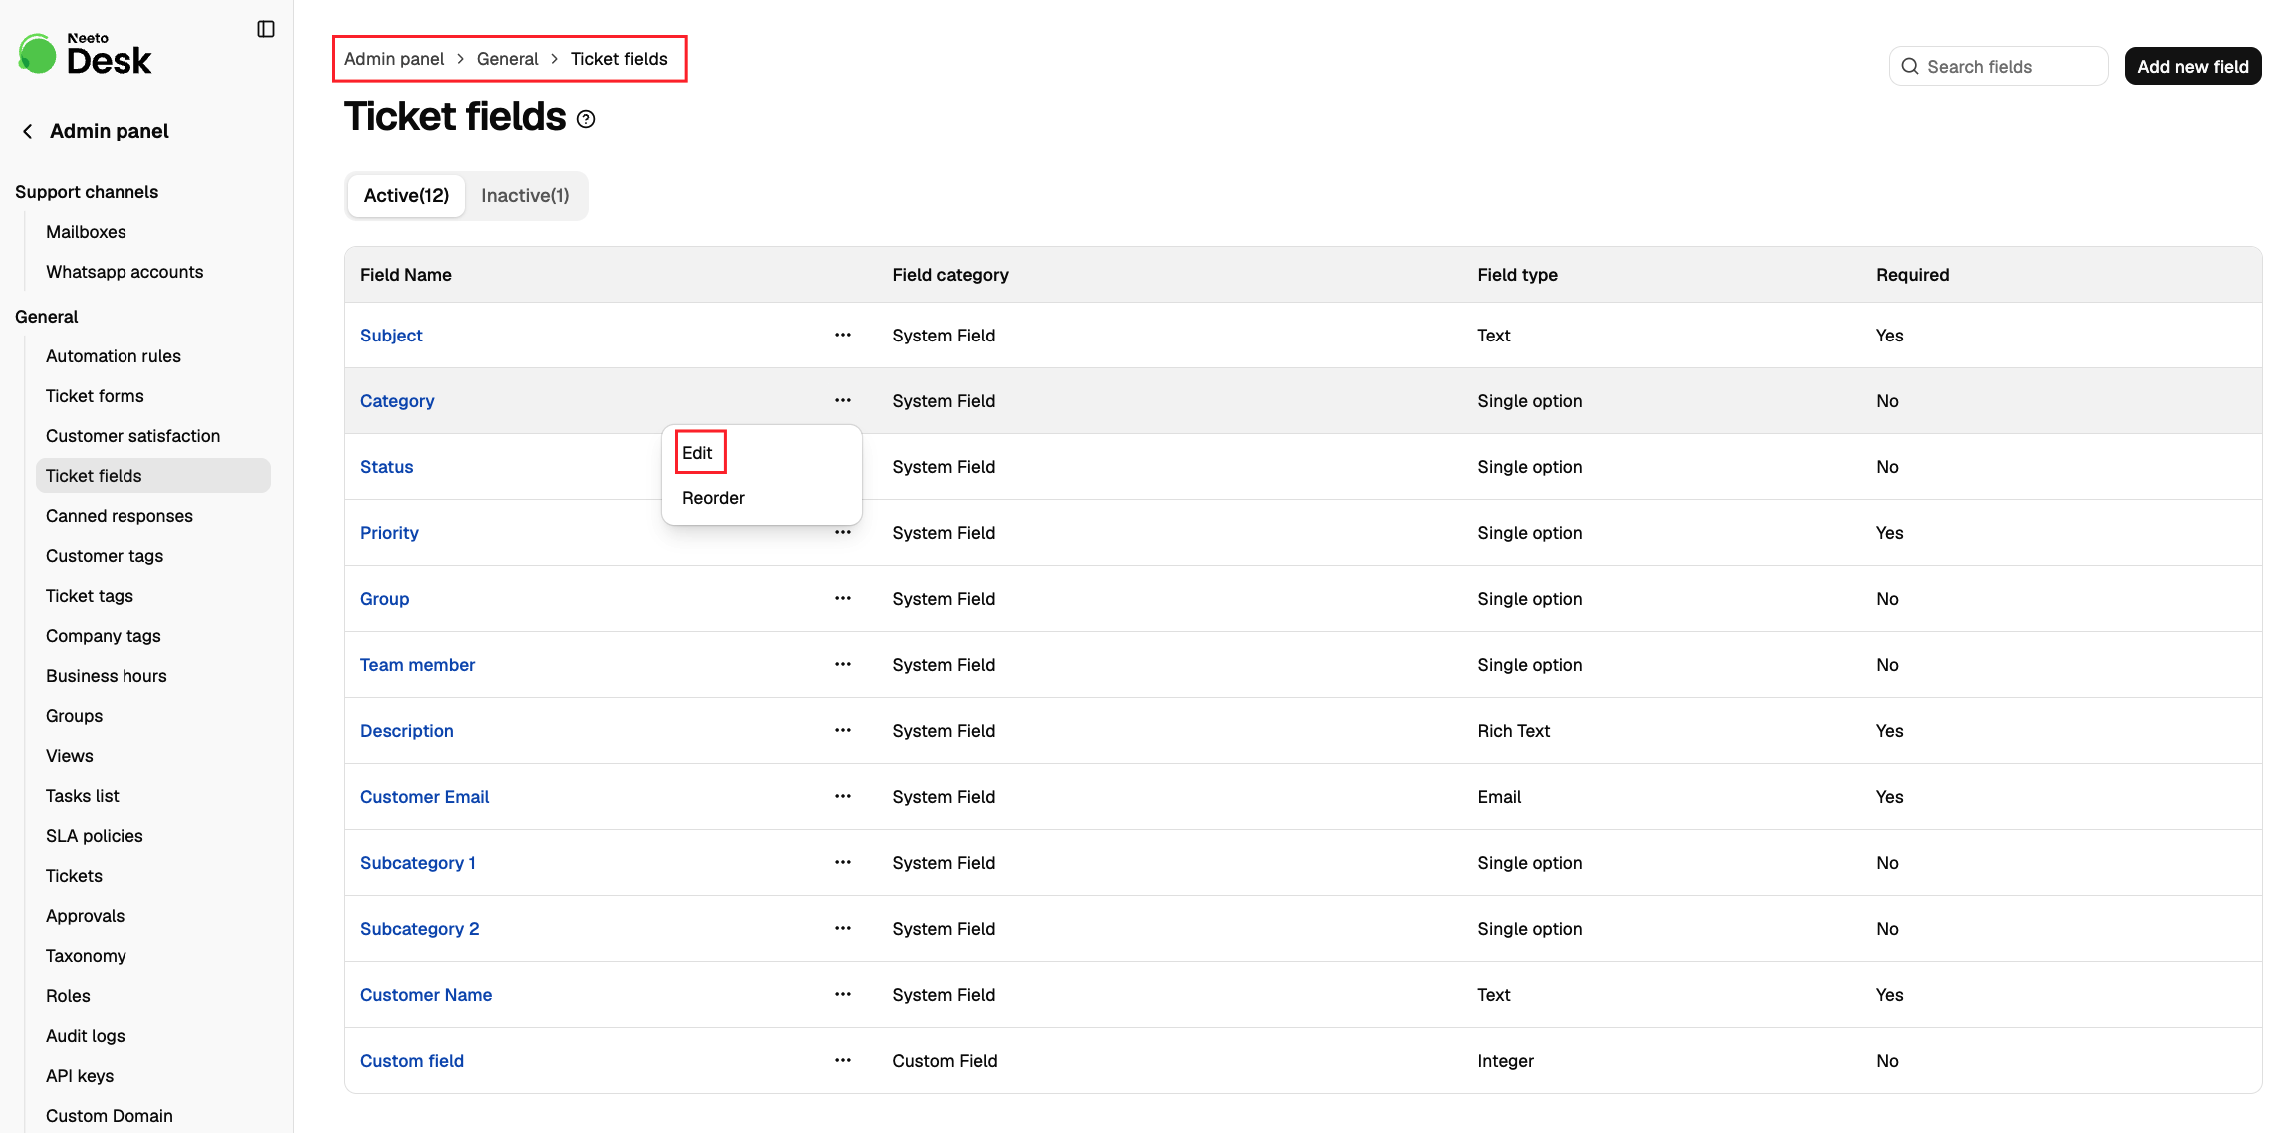
Go to Admin Panel.
Click on Ticket Fields card.
Click the triple dot (...) next to the field you want to edit.
Add new options or rename existing ones as needed.
-
Click Save changes
These changes will immediately reflect across all relevant workflows.
Team member labels and customer labels
Every status carries two labels. The team member label is the wording your team sees inside NeetoDesk: on the ticket, in the ticket list and its filter, when you build automation rules, views, and canned responses, and in reports. The customer label is the wording customers see when the status is mentioned in an email you send them.
The two are independent, so the same status can read "Triage" for your team and "Received" for the customer. Both sit side by side in the Status field, and you fill in each one separately.
Renaming the team member label of a built-in status
Built-in statuses such as New, Open, and Closed can be renamed, so your team sees the wording it actually uses.
Go to Admin Panel.
Click on General.
Click on Ticket fields, and then open the Status field.
Edit the Team member label of the status you want to rename.
-
Click on Save changes.
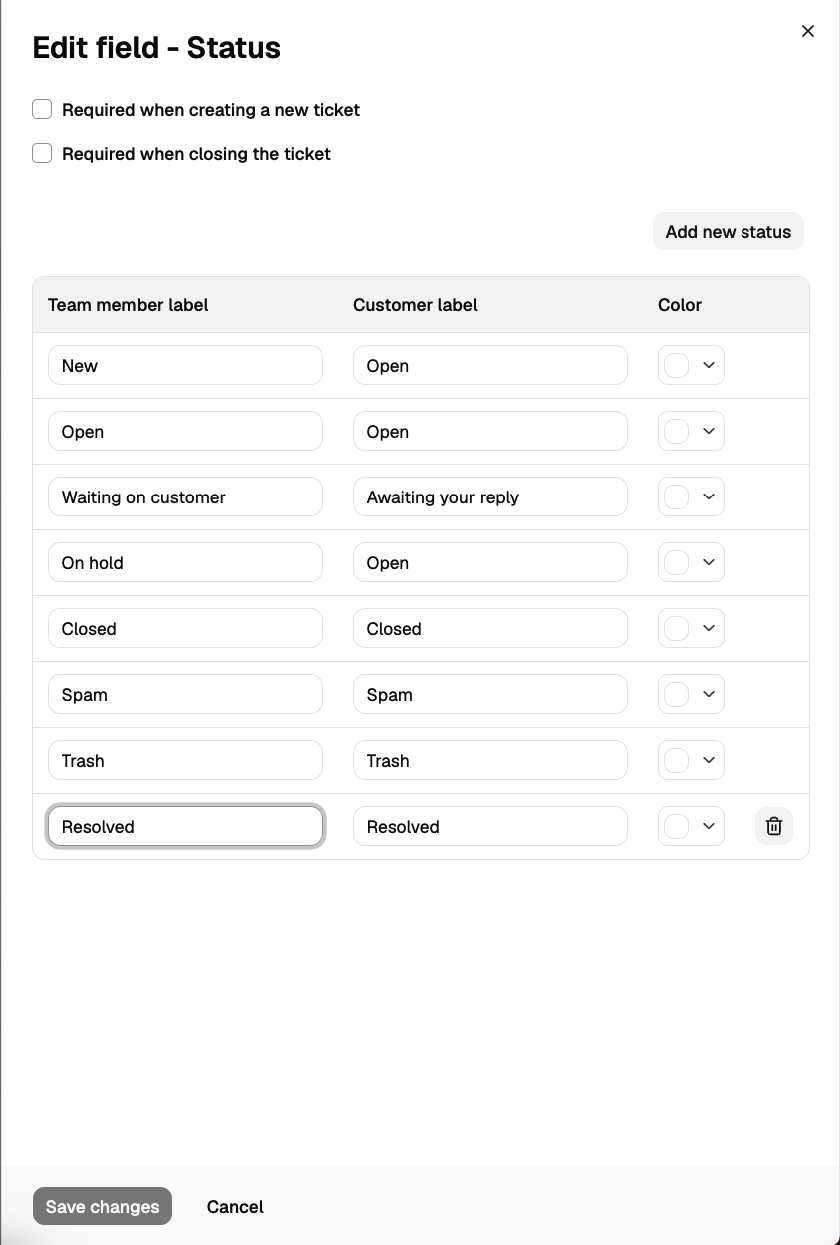
Renaming a built-in status changes only the wording your team members see. Tickets stay on the same status, and automations, views, and macros that reference it keep working. The new label also appears in the status filter on the ticket list and in the ticket volume reports.
Every status needs both a team member label and a customer label, and no two statuses can share the same team member label. Built-in statuses can't be deleted.
Reordering Categories, Statuses and Priorities
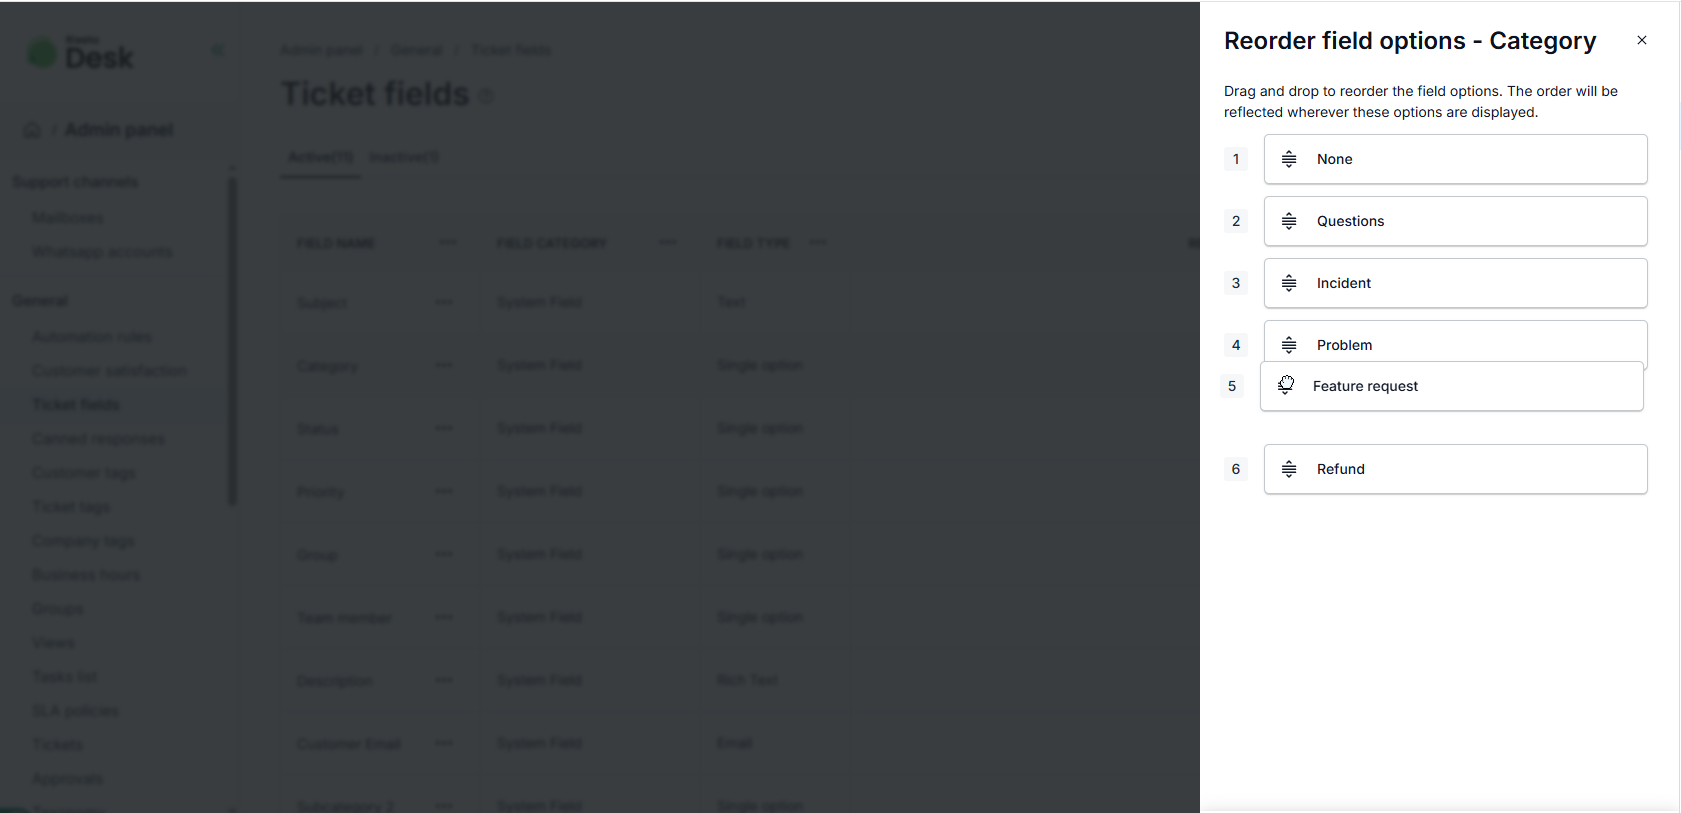
If you have ticket fields that are used more frequently, you can reorder them to appear first in the ticket view.
Go to Admin Panel.
Click on Ticket Fields card.
Click the triple dot (...) next to the field you want to edit.
Click on Reorder.
Reorder based on your preference.
Click Save changes.